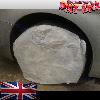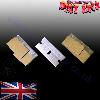
DIY Dipping Process Part 1Check the condition of your project Although a simple stage, a very important one! 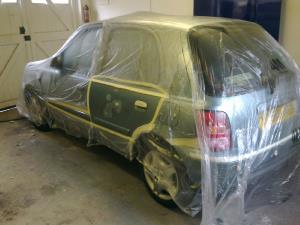 Bodywork repairs? Has it had any repairs lately? If your car has had a SMART repair (guy that comes to you to repair small damages, bumper scuffs etc.) then we recommend you wait till 3 months after repair before you coat it in ANY dip. The reason for this is the repair takes at least 6 weeks to cure 100%. If you cover this then the chemicals cannot cure properly and you may suffer reactions. fish eyes or damage to it when you peel. If has been completed in a proper bodyshop the repair will be a lot more resilient. We'd still wait 6 weeks though. Why do we recommend this? Unlike a lot of new dip 'suppliers' or 'installers', we were a bodyshop before and we did full on restores, resprays and SMART repairs. So are fully qualified to comment on this. 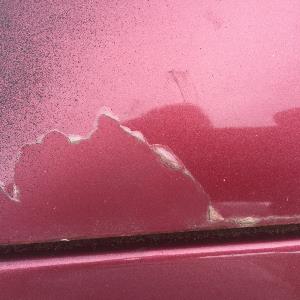 Flaking lacquer / Peeling lacquer? If you have this, then you can certainly dip straight over it. But, you will see a pattern of the flakes when the project is finished. You will also peel the rest of the lacquer when you remove the dip. this is due to the laqcuer already not bonding to the car ok, the dip bond to the loose lacquer better than it is bonding to the car, hence will come away with the dip. FIX - sand the damaged lacquer with 1500 wet n dry and smooth it out. FIX - Jet-wash effected area and all the loose lacquer should flake off. Once whole panel is done you should be good to go. 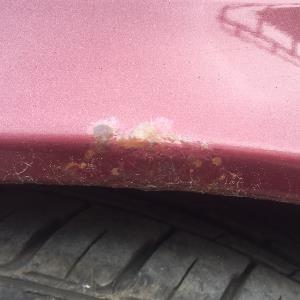 Rust? Any rust on the car? You can dip straight over rust no problem. It will kinda hide it, you will still see the bubbling and pattern of it, but the project will all be one colour. It will NOT stop it rusting, it will still continue below the dip. Thoughts are that it might slow it down as it is starved of oxygen, but we have no basis to believe this as fact at all. Best thing is to grind / sand it back. Skim of filler. Sand and prime. As long as sanded back to at least 1000grit should all be ok. if you can see or feel scratches / imperfections, they will still be there after dipping, it will hide, but not 'FIX'. See 'primer' section for issues 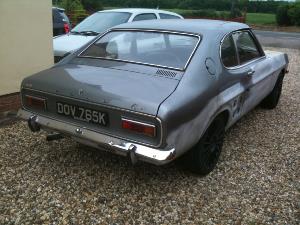 Primer patches / panels? Any panels in primer? Any repairs in primer? Rust repairs in primer? As long as sanded to at least 1000 grit, should be ok. ANY scratches, imperfections, pinholes etc visible or to be felt will still be there, the dip will hide imperfections, but not 'FIX' them. See new paint / repairs section. Biggest issue with primered surfaces is the fact it does its job well, and the dip bonds to it REALLY well. When it comes to removal, it is really difficult to peel from the primered areas. If you can, you are best to get a coat of paint on it (any colour will do as you are about to recoat it later anyway), this will help peeling in the future. But, see the new paint repairs section. 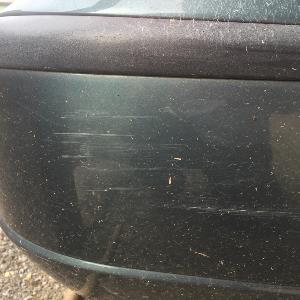 Scratches? Stonechips? Any damage? Scratches, Stonechips etc can easily be covered and hidden. It will not fix them, but it will hide them. The picture above can be covered and successfully hidden. You may still see the scratches etc. if you look at certain angles and you already know they are there. But to a casual look, they will be 'hidden'. If you look at picture, you can see they are light scratches, through to primer but not to metal. No panel damage. 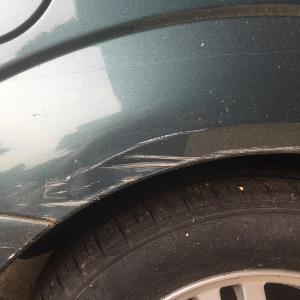 Bigger Damage? Any bigger damage than the previous(picture above), cannot be fixed or hidden and will need repairing prior to dipping. Again, refer to primer / new paint repair section. As you can see in this picture, although only small damage, you can see the scratches have not only gone through the primer, but to the metal too. Also the panel has been dented and deformed. All this will show if you dip over it.  Vinyl Wrapped? If the car is already wrapped using vinyl, a lot of the time you can go straight over it. Assuming a good quality film has been used. If the cheap films have been used then you may get reactions. Our preference is to remove it. If you don't, once you dip over it you will still be faced with the problems you had with shrinkage, joins and bubbles, they will still show. So for best results remove it, or the best finish you can get is the terrible wrap you are trying to hide :) Yes, we get this picture sent to us 5/6 times a month. Its a wrap. We do a pigment for it HERE; Products we use in next step Either jet-wash or manual wash it. Best thing to use is a simple bucket of hot water and washing up liquid. Nothing fancy needed! The car / wheels need to be cleaner than new. All dirt, tar, brake dust and grime gone. The dip will stick to whatever you spray it onto, spray it onto dirt and it will fail, it will self peel, bubble or lift. So make sure its clean. Everything.On cars pay particular attention to the sills, trim, gutters, grills etc. All the tight little corners and gully's you would not normally pay attention to. These are the areas it will lift. If it is clean, it will stay in place and you won't have a problem - and that's what we're after :)On wheels pay special attention in the corners of spokes. Brake dust is pretty hard to remove, but if you do not, the dip will not stick. Remember the wheels take a battering, all the weathers, all the elements. And most importantly subject to centrifugal forces all trying to remove the dip. A clean wheel will be fine :)For trim, badges, grills etc. same as wheels, pay attention to the corners. The front grill gets a lot of dead insects, they are particularly annoying to get rid of!The reason we use washing up liquid? We've always been told not to, why? Because it does a really good job! Downside is it removes all the waxes and polishes as well. This is normally a bad thing, but we want to do this, to give the dip a really good chance to bond. Ok, so we washed the car and now its cleaner than new! Next phase is to dry it. Because as soon as you start to spray, the air pressure will blow into the nooks and crannies, blowing out any traces of water. The dip will not stick to water. We find washing the car the day before dipping helps a lot, keep it inside overnight. We also find if using a compressor setup you can blow into all the gaps, this will blow all the remaining water out. Car is completely dry. Now we start to strip it. When we dip a car here, we remove as much as we can, mirrors, lights, trim, grills, door handles, washer jets, wheels, anything removable, we remove. So firstly, jack the car up and sit it on axle stands. This serves 2 purposes, one, gives proper access to inside the arches and more importantly the sills. You can get right underneath for complete coverage. Two, allows you to remove the wheels and dip them separately or keep away avoiding cleaning the overspray afterwards. Why do we remove parts? The weak part of any dip job is the edges, so by removing the mirror, we dip completely behind it, then refitting the mirror there are NO weak edges as they are covered by the mirror :) This works for all places. Handles for example, the backs are the weak spot as you are constantly pulling at them to open the door, you cannot dip the back properly, so remove them and you can dip it completely and it will last years of pulling and never peel from the back. This is a longer job to remove everything, harder work, but the finish is far superior to not removing anything, lasts longer and looks nicer. Products we use in next step Use a microfibre cloth and predip now. Clean the entire car with predip. This removes any remaining waxes / polishes, fingerprints and allows the masking tape to stick better. Now mask the entire car. All the parts you do not want to dip. We mask the windows. You can dip over them and peel, but is a waste of dip. We prefer to mask and save the dip :) Mask all inside the car, door jams, boot jams, bonnet jams. Remember to cover all radiators, A/C rads and intercoolers. If you dip over them then next time car is in traffic car will overheat. Once car is completely masked then predip it again. the removes and dirt and greasy fingerprints from all the masking. The car is now ready to be dipped. |